I put pictures and commentary from my excellent DragonCon experience last week up on my regular blog. I inexplicably didn't take many pictures of random people dressed up, but there are lots and lots of blogs/sites out there with lots of pictures.
As I say, I had a fantastic time. I wore my modest costume on Saturday and got some compliments, especially on my awesome hat, attended a bunch of panels, saw friends, met new people, and saw some of my absolute favorite musicians perform. But now I'm back and I'm still not recovered from an intense, sleep-deprived weekend.
So this week I haven't done anything except laundry and housework. Yardwork's next, when I can muster my enthusiasm. The blog will probably be quiet for the next few weeks, if not longer, while I work on other stuff. But one thing I did find time for was finishing the nightgown that started this whole steampunk garage project.
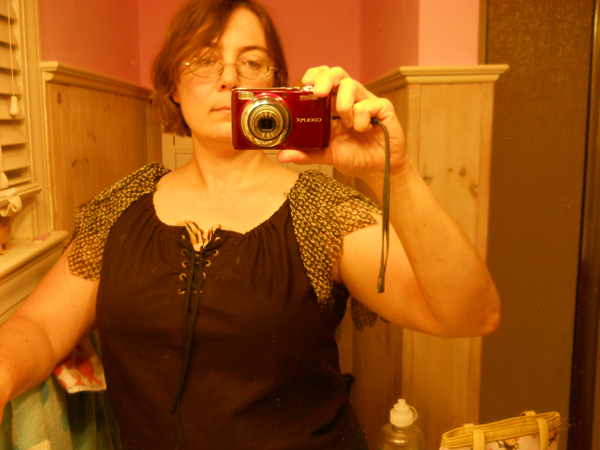
My camera has vanished, but here's a small picture I took with my phone. The nightgown is simple and not terribly attractive when worn--I used this tutorial. I learned a lot about sewing from making this thing, though, including how to sew ruffles. I am something of an expert ruffler now, but it all started here. I had fun doing the embroidery although it's not as elaborate as I'd intended.
So what's up for the steampunk garage in the near future? A lot of clutter has crept back into the garage and I need to tidy it, for one thing. I also want to finish turning my antique brass blowtorch into a steampunk "weapon." And I want to make another steampunk outfit so I've got something warm and non-feathery to wear to AnachroCon in February (and probably ChattaCon in January).
So keep checking back, and hopefully soon I'll be back to work in the garage. First, though, I need to finish this steampunk YA I've been writing.
How I turned my garage into a steampunk workshop without going broke, going crazy, or having nowhere to put my car.
Showing posts with label after. Show all posts
Saturday, September 7, 2013
Sunday, August 25, 2013
Yes! Pictures of my DragonCon costume!
It's not complete--I still have the bag to finish, and a few little additions--but the bulk of it is done and I got real pictures taken today.
My aunt Janice took the pictures, and she said I definitely need to wear my boots instead of the heels I had planned. The boots are more comfortable anyway. Here's a closeup of them along with my lacy socks, with me pulling my skirt up a bit to show off my petticoat:
I also need to take both the petticoat and the skirt in a bit. They're just too big. When I suck my gut in (ahem) to fasten my corset, the skirt and petticoat sag. Once the corset's fastened it's hard to adjust my clothes. Also, for anyone who's never worn a corset before: it's the last thing you should put on, including shoes. Especially shoes.
That hat is so awesome.
And here's me trying not to laugh, because of course Janice kept cracking me up. She got some action shots of me goofing around pretending to catch owls, but they were A) blurry and B) made me look insane. You'll just have to find me at DragonCon to see me acting insane. I'm not used to seeing myself doing anything but standing in front of the mirror, of course, so maybe I always look insane.
Friday, August 23, 2013
The Other Half of the Shirt
The shirt is finally finished. It took much longer than I expected. Here it is finished, first of all--and no, I'm not wearing my corset because I just ate a burger and fries and two cookies and I'm not sure I could fasten it at the moment. Also I'm wearing my glasses. On the plus side, I just got my hair cut today.
My first step was to hem the, the--what the hell is that called, anyway? I just searched Wikipedia with no luck. Let's call it the placket in the middle of the neckline, even though technically it's not a placket. Anyway, my first step was to hem the placket and add grommets. Now that I know how to add grommets, I can see I'll be adding them to everything. I laced the placket up with more of the cord cut from the extra laces from my corset (although if I keep eating like I did today, I'm going to have to loosen the cords again).
I tried it on to see what it looked like, and oops. No matter how tightly I pulled the laces, I was showing an awful lot of cleavage. I decided to make a modesty panel.
I was messing around with various fabrics to see what would look best when I noticed a yard of feather tape I'd bought off etsy on a whim, months ago, but never found a use for. The feathers are short and small compared to the feather tape I used to trim my petticoat. On impulse I held them up to the placket, and loved the effect.
So I sewed a piece of feather tape on either side of the placket, feathers pointing in. They hide what I need to hide and look good too. I worried they'd tickle, but they don't.
After that I had to do the sleeves. I did a terrible job. I ended up adding three layers of fabric to each sleeve and I still don't like the effect, but I'm tired of fooling with it so it'll have to do. I trimmed each layer in feather-like scallops.
Incidentally, I stabbed my thumb badly last night while working on the sleeves. Then I stepped on a sewing needle and drove it right up into my bare foot. If it had been the same needle both times, that might have been understandable. Instead, I got up to deal with my bleeding thumb, came back and sat down at the computer to tweet about it (tweeting about an event is the most important part of an event, right?), then stood up to go back to sewing, at which point I accidentally knocked a loose needle off the computer desk, it fell into the pile of the carpet point-up, and I stepped on it. This is why I didn't finish the shirt until tonight.
If all goes well, I should have photos up of me in my full DragonCon outfit, probably on Sunday. And these will be real pictures, not selfies taken in the dirty mirror in the garage. It will be epic.
Saturday, August 3, 2013
The petticoat: finished!
It took me two weeks of working on it almost every night, sometimes for a few hours at a time, but it's done. I'm proud of it. Here it is on, and you can also see my corset and the top I may or may not actually wear with the final outfit. More about that tomorrow. Sorry the mirror in the garage is so filthy--it's my only full-length mirror.
(I threw a bathrobe over the outfit because I had to walk from the house to the garage, and my neighbors think I'm eccentric enough already.)
I fell in love with the lace I used on the hem, so I got more to trim the waistband--even though it doesn't show. I decided to put elastic in the back seam rather than bothering with buttons, but I was in a hurry and got sloppy when sewing the casing. When I started to feed the 3/4" elastic into the casing, it turned out that part of the casing was way too narrow. Rather than rip out the seam and do it over, I used a thinner piece of elastic. The thinner elastic isn't as springy, though, and the waistband is a bit loose. But as long as it's tucked under my corset, it's not going anywhere. Anyway, I only sewed lace to the flat front of the waistband.
I'm glad I decided to use this fabric for a petticoat instead of my skirt. I don't love it now as much as I did when I bought it. The fabric I have for the skirt is much darker, with a lot of black in it that should look dramatic. Now I just have to make the skirt.
I have four weeks, three weekends.
Sunday, July 14, 2013
The Goggles are Done, or, Don't Eat the Goggles
My buckle order came! I ordered lots of stuff in hopes that I could find uses for it all. Unfortunately, none of the buckles were really small enough for what I had in mind--a headstrap for my goggles.
So I did what I probably should have done in the first place: I used ribbon. Specifically I used some brown woven flat cord, which I tied to a pair of hooky things. I can easily hook and unhook them to the D-rings on the goggles to put them on and take them off.
I hadn't though the goggles would fit on my hat, which has a narrow brim. But look here! All I had to do was add another hook and a loop. It's not beautiful--and I'll have to find a bigger hoop, because it's a tad tight and I don't want to crunch my hat--but it works just fine.
I moved the pin with the copper owl charms to the back of the hat, which gives it a bit more interest from the back and will hopefully help keep the goggle strap from riding up and coming off.
I still think there are too many feathers on those goggles. I mean, the cat thought it was a new toy and kept trying to eat the feathers, so yeah, too many. But there's nothing I can do about it now.
So the hat/goggles combo for my costume are done. As soon as I get my corset, I have to go into overdrive to make the skirt and top. I have only the barest smidge of an idea of what I want, too, and the cloth feathers all turned out disappointing, and I look like a dork and I look like my mother. I'm going to go mow the lawn, dammit.
So I did what I probably should have done in the first place: I used ribbon. Specifically I used some brown woven flat cord, which I tied to a pair of hooky things. I can easily hook and unhook them to the D-rings on the goggles to put them on and take them off.
I badly need to clean the bathroom mirror, don't I?
I hadn't though the goggles would fit on my hat, which has a narrow brim. But look here! All I had to do was add another hook and a loop. It's not beautiful--and I'll have to find a bigger hoop, because it's a tad tight and I don't want to crunch my hat--but it works just fine.
I moved the pin with the copper owl charms to the back of the hat, which gives it a bit more interest from the back and will hopefully help keep the goggle strap from riding up and coming off.
I still think there are too many feathers on those goggles. I mean, the cat thought it was a new toy and kept trying to eat the feathers, so yeah, too many. But there's nothing I can do about it now.
So the hat/goggles combo for my costume are done. As soon as I get my corset, I have to go into overdrive to make the skirt and top. I have only the barest smidge of an idea of what I want, too, and the cloth feathers all turned out disappointing, and I look like a dork and I look like my mother. I'm going to go mow the lawn, dammit.
Sunday, April 28, 2013
mismatched shelves
This morning I woke up feeling like I was coming down with some kind of crud--not bad, and not unexpected considering I've been coughing my head off for a few days, but not fun either. So I didn't do much today.
In fact, all I'd intended to do was add a bracket to the long shelf I put up yesterday, then use wood glue to stick the two wooden brackets to the wall better. But the wood glue worked so well that I decided to put the second shelf up today after all. I added a third bracket. It doesn't match. This is going to drive me crazy enough that I will probably go back to the store eventually and get a third wooden bracket to match. And then I won't be able to get the metal bracket off the wall.
The problem was, when I put one of the particleboards on the brackets to see how it looked, it was much too wide for the brackets. Well, crap. But there are all kinds of old boards stored in the rafters, so I pulled one of the shorter pieces down and sawed it in half.
(This sounds much easier than it was. Actually, it was easy: it's an old board and sawed easily. The problem was I didn't have a real saw, just a bowsaw, so I had to go back to the store for like the 40th time this weekend to buy one.)
The wood was so beautifully weathered that I decided it didn't need staining, which by an amazing coincidence matched up with my desire to never stain anything ever again. I put the back piece up first, nailing it inexpertly to the studs (I am really very bad at nailing). Then I put the shelf piece up and secured it with a single screw, because I didn't feel like doing anything else and it feels pretty sturdy and anyway I just want to go to bed and watch River Monsters.
Hopefully it'll still be there tomorrow. If the wood glue fails overnight, all my new bottles are going to smash and I'll be sad.
Also, if you ever think I'm being modest when I say I'm a slapdash worker, keep in mind that I didn't actually use a level on that shelf. I just eyeballed it. It only tilts a little.
Saturday, April 20, 2013
The shelves, before and after
Finally it's the weekend, which means I can get back to work on the garage. It's taking me so much longer than I expected!
Today I took three trips to the dump and one to Goodwill, getting rid of eight or nine bags of stuff in all. There's more to go, but I was too embarrassed to go to the dump again. It'll keep.
I wanted to accomplish something today that would make me feel like I'm actually making progress. So I focused on the brick-and-board shelves that used to hold gardening stuff.
I'd never stained wood before, at least not that I recall, and I was a bit intimidated. I don't know why. It was ludicrously simple. I stained the table in the back corner of the garage first, and it was not only easy but I thought it looked really good immediately.
Of course everything's easy if you do a sloppy job. I have low standards.
I let the boards dry for a few hours while I worked in the yard and ran errands (in that order, so I probably frightened some people with my appearance). Then I stacked the bricks, making sure that each pair was the same height since the bricks were a mixture of new pavers and very old bricks, some of them apparently handmade.
It looked good when done, and I had a few fun minutes decorating it. All the stuff on the shelves was already in the garage, incidentally. This might be a good time to mention that my grandmother was an antique dealer for decades. Me and my brother and all our cousins grew up helping move furniture, and along the way we absorbed a lot of knowledge and interest in antiques. Most of the stuff on the shelves, though, was my mother's.
Tomorrow I'll arrange more furniture, sweep the garage out, and make some decisions about what to do with all those boxes of Christmas decorations. And if I have time, I'll hit the antique shops. I need some gadgets.
Subscribe to:
Posts (Atom)